Edit Images
Students in design-related majors will learn to use Photoshop, but all students need to learn basic image editing skills for class assignments.
In this section, we’re going to introduce you to image editing resources available to use on your iPad.
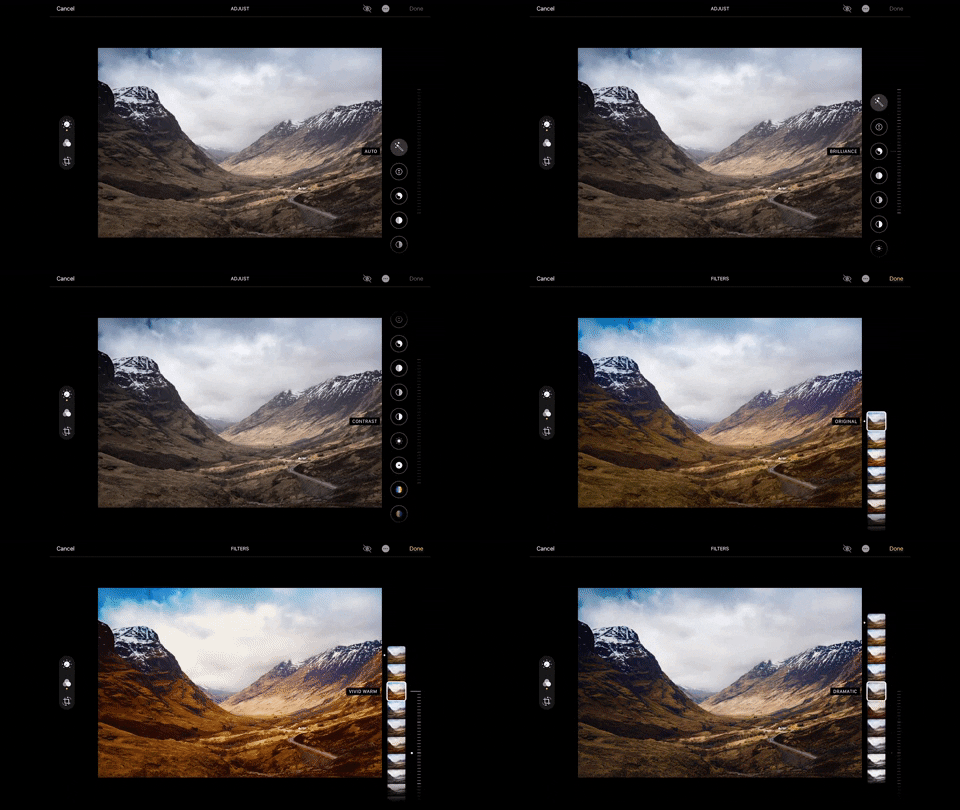
Edit an Image in Photos
Make basic edits to your image in the Photos app.
- Open the Photos app
- Tap the image you want to edit
- Tap Edit in the top right corner of the screen. You will enter the editing view and see buttons to the left and right of the image
- Choose a button on the left side of the screen to edit image effects like light and color, filters and crop and straighten
- Choose a button on the right to further refine the effect. Swipe up to scroll through the effects

- Tap Done to save the image or tap Cancel to discard the edits you made
Markup an Image
Mark up an image using your Apple Pencil or your finger. Make an annotation, doodle or even sign a form. Start by tapping the more icon (…) in the upper right corner of the screen and select Markup.

- Use the menu at the bottom of the screen to write, highlight, erase and more
- Tap the plus icon (+) for more features, like saving your signature for future use
- Tap Done to save or tap Cancel to discard the changes you made in Markup

Other Apps to Edit Images
Take your image editing to the next level by using an app with more photo editing features. Here’s a few that we recommend:
- Adobe Spark Post: Geared towards social media promotion, this app takes the guesswork out of making engaging images that combine text, illustration, and collage elements. You can download this app from Self Service, Apple’s App Store or the Google Play Store, or access its features in a web browser.
- Adobe Fresco: Although it’s a drawing and painting app, your creations in Fresco will enhance any photo that you’ve taken with a handmade flourish. You can download this app from Self Service, Apple’s App Store or the Windows Store.


