Step 1: Sign Up and Log In
- Go to the Globus website.
- Click on the Log In button, look up "Ohio State University".
- Sign in with OSU's Single Sign On (your name.# identity).
- Note, if you previously used Globus with another login, you can link it to your Ohio State University login.
- When linked, both logins will be able to access the same Globus account permissions and history.
- If you are a new user you will need to state you are an educational user and allow Globus permissions.
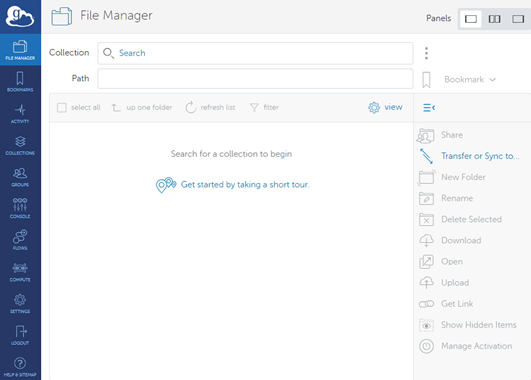
Step 2: File Manager
- After logging in, you will be directed to the Globus dashboard.
You will be dropped into the "File Manager" tab.
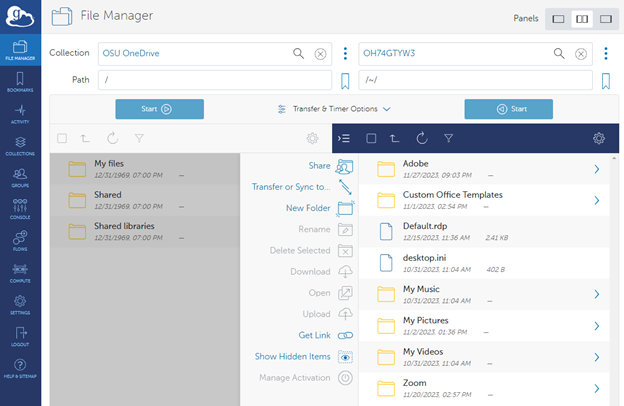
Step 3: Configure Transfer
- In the File Manager configuration section:
- In the Collections box select the source endpoint (where your data is located).
- In the Collection Search screen use keywords or known collection names to locate the Collection.
- Depending on the collection you may be asked for additional permissions / login / access.
- For example, OneDrive will require sign into OSU's Microsoft 365 instance.
- Select the files or directories you want to transfer.
- Depending on the collection you may be asked for additional permissions / login / access.
- On the left sidebar select Transfer or Sync to...
- Select the destination collection (where you want to transfer your data).
- If you want to transfer from your desktop/laptop download the Globus Connect Personal Connect application (Mac/Windows/Linux)).
- You can also use Panels in the upper right to see source, destination, or both.
- Select the destination collection (where you want to transfer your data).
- Between the two Start buttons, set "Transfer & Timer Options", such as overwriting files or preserving timestamps, if desired.
- In the Collections box select the source endpoint (where your data is located).
Step 6: Review and Start Transfer
Review the transfer details to ensure everything is set up correctly.
Click "Start" to initiate the transfer.
A green pop-up window will inform you your request is submitted.
Step 7: Monitor Transfer Progress
After starting the transfer, click "View details" on the green pop-up window.
Here, you can monitor the progress of your transfer, including transfer speed and completion percentage.
Step 8: Manage Transfers
On the "Activity" tab, you can pause, cancel, or restart transfers if needed.
Completed transfers will be listed as well.
Step 9: Notifications and Completion
You can set up email notifications to receive updates about your transfers.
Once the transfer is complete, you will receive an email notification with status.