Proposal Status
The proposal status listed in the Status column indicates the state of a proposal.
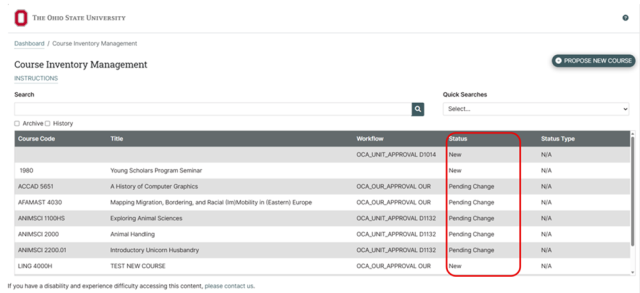
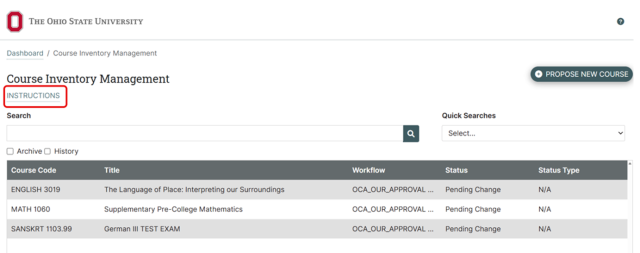
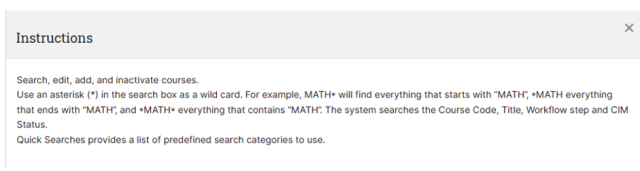
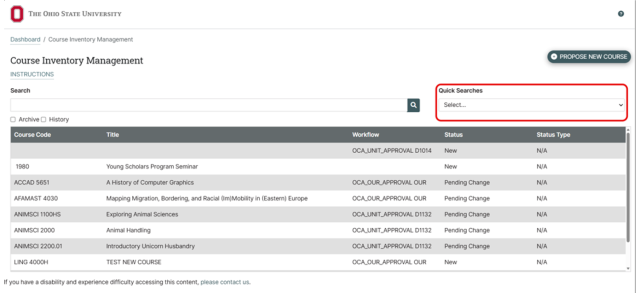
You can search for a specific Course Status by utilizing the Quick Searches...drop down.
New — This status indicates that a New Course Proposal has been initiated for this course.
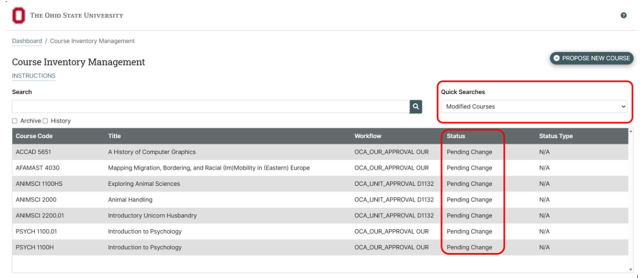
Edited — This status indicates that a course that previously existed in the Student Information System has been edited
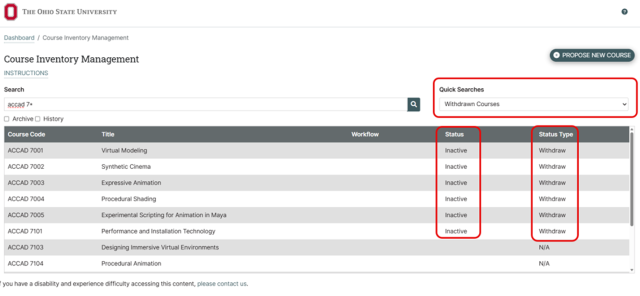
Inactive/Withdraw — This status indicates that a course has been proposed to be made inactive or is currently inactive in the Student Information System
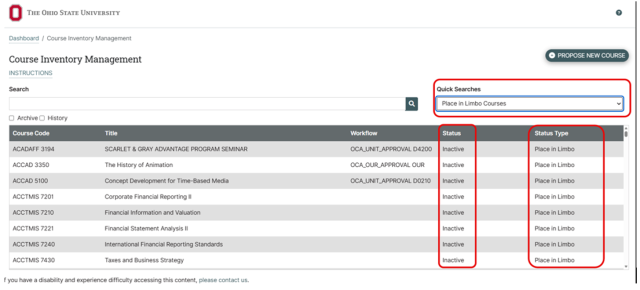
Inactive/Place in Limbo – This status indicates that the course has not been offered in three or more years and administratively placed “in limbo”
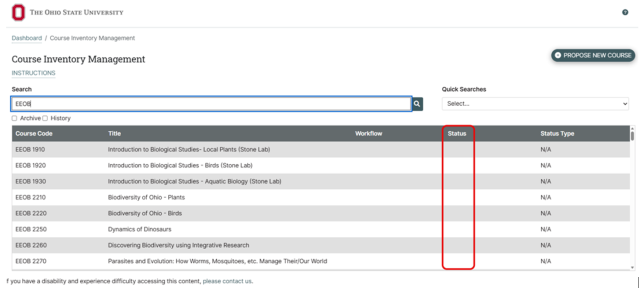
Blank — This indicates that the course exists in the Student Information System, but it is not in any CIM proposal process at this time. It is at rest
Course Code Lifecycle
A Course Code (typically the subject code and course number) can be in one of four stages. It can be New, Active, Inactive, or Archived.
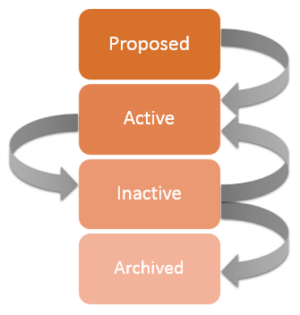
Lifecycle of a Course Code.
A New Course Code resides in CIM only until it has been fully approved and entered into the SIS, at which point it becomes Active. While a proposal is New, no other proposal may be created with the same Course Code. If a New proposal is shredded before reaching approval, no record of its existence will remain, and the Course Code may be used again immediately.
An Active Course Code resides in CIM and your SIS. While a proposal is Active, no other proposal may have the same Course Code. If an Active proposal is edited, the edits in CIM will display with red/green markup. Those edits must be edited in the SIS in order to complete the approval process and set the course back at rest. If an Active edited proposal is shredded, the edits will be deleted, and the course will be set back to its original content in CIM before the edit. An Active course may be proposed to be Inactive.
An Inactive Course Code may reside in CIM, in the SIS, or both. Editing of Inactive courses is not allowed, but they will remain in the CIM search box with the designation Inactivate in the status field until that Course Code is Archived.
An Archived Course Code resides only in the SIS. Archived Course Codes may be used again for a new proposal. Codes are Archived manually through CourseLeaf support by removing the Course Code from the CIM search box. The CIM history of the Course Code is retained, but it will no longer appear in search results. Archived Course Codes may not be unarchived; a New proposal must be started instead.
Field Types
Each CIM form is unique, but forms generally have the following field types:
- Text field - a field for entering plain text. This is one line of text (no line breaks or paragraphs) that may include numbers, letters, punctuation, and special characters
- Text area field - a larger text field that will allow for line breaks/paragraphs
- Formatted text field - a field that allows for formatting with a Page Body Editor toolbar
- Drop down field - a field that will allow a choice of one from a list of items. Drop-down field values are controlled in CIM Code Management
- Radio Button - a field that will allow (usually) one choice from a list of options, commonly used to answer Yes or No questions. Values beyond simply Yes and No are controlled in CIM Code Management
- Checkbox - a field that will allow one or more choices from a list of options. Values are controlled in CIM Code Management
- Upload/Attachments - a button that will allow the user to upload a document
- Allowed document types may be customized, but generally allowed files are:
- Image files (filenames ending in .gif, .jpg, .jpeg, or .png)
- Movies or animations (filenames ending in .mov, or .swf)
- Plain text files (filenames ending in .txt)
- Microsoft Office files (filenames ending in .doc, .xls, .ppt, .xml, .docx, .xlsx, .rtf, .odt); these may be limited per institution
- Adobe Portable Document Format files (.pdf)
- Prohibited document types:
- Courseleaf configuration files (filenames ending in .tcf, .tca, .tso)
- Filenames with more than one '.' character
- File size and number of attachment is virtually unlimited unless configured by CourseLeaf
- Allowed document types may be customized, but generally allowed files are:
- Multipart field - a multipart field is made up of the above fields, but all of the fields are joined to make one entry. For instance, a multipart field might include a text field, a drop-down field, and a check box. The multipart field would collect all of the pieces for one entry, then another entry of the same fields may be added by clicking the plus icon
- Course Picker - a course picker allows the user to choose one or more courses from a course database. The course database may be made up of all courses in CIM or all active courses extracted from the SIS
On this page
- Overview
- How to Propose a New Course
- How to Propose to Inactivate a Course
Overview
CIM courses allow users to propose a new course, propose edits to an existing course, or propose to delete/inloactivate an existing course. These proposals are then submitted through the appropriate workflow approval processes where users can edit, approve, or rollback the proposal. The CIM landing page allows a user to search for and view CIM Courses. From here, you can also see the status of a course and whether or not it is in workflow. While courses in workflow can be modified through the workflow and approval process, they cannot be modified from the CIM landing page until they have completed workflow.
How to Propose a New Course
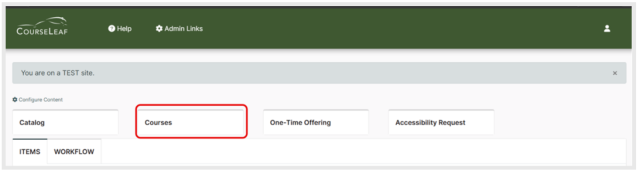
From the Dashboard click the Courses tab.
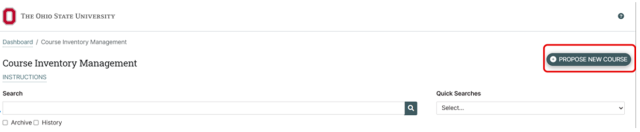
Click Propose New Course
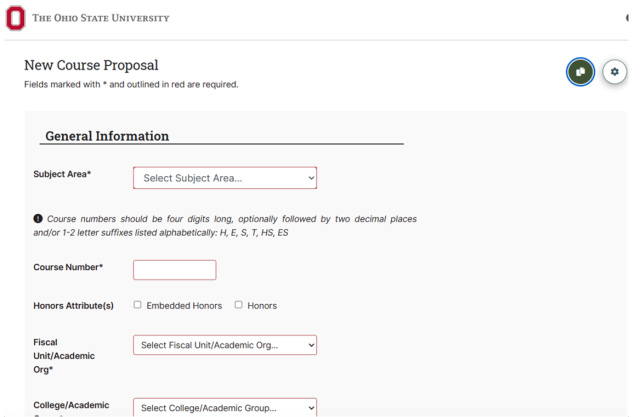
Complete the form by filling in required information. Required information is indicated by a red field outline.
- After completing the form, click one of the following:
- Cancel to not save any changes and return to the previous window
- Save (or Save Changes depending on verison) to save any changes that have been made and come back to the form at a later time. Clicking Save does not submit the proposed changes to workflow and will allow you to save without filling out all the required fields. The status of the saved form will be "Added" and may be edited at a later time by searching for the course or doing a quick search for all added courses
Save & Submit (Start Workflow) to save and submit all changes for approval. All required fields must be filled out before the proposal can be submitted for approval. The new course proposal will go to the next person in the workflow. The next user in workflow will be sent an automated email to notify the user the new course proposal is ready to be reviewed, edited, approved, or rejected.

How to Propose an Edit to a Course
- Type the field of study abbreviation, course title, or course code that you want to edit into the search field.
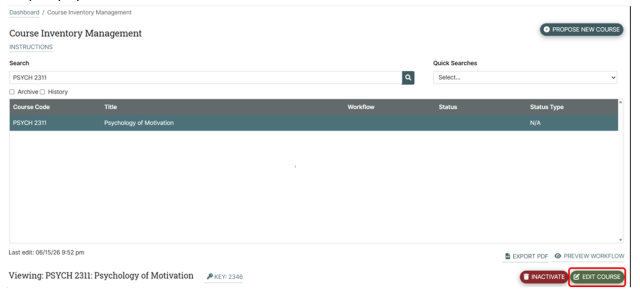
Select the course that you wish to edit from the results window.
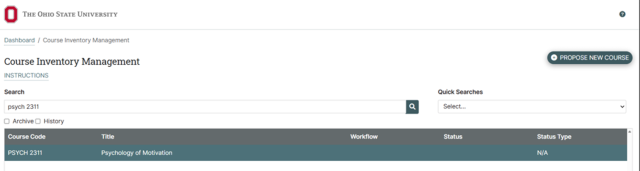
Click the Edit Course button in the CIM window. Some of the fields in this form will be pre-populated with text
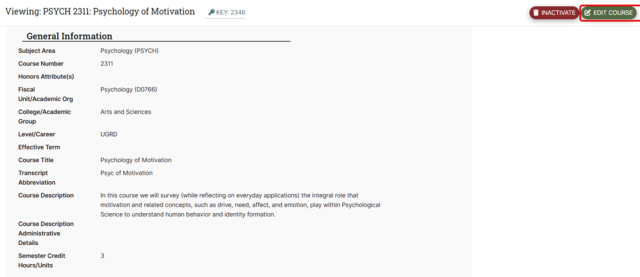
- Make your updates to the form.
- After editing the form, click one of the following:
- Cancel to not save any changes and return to the previous window.
- Save to save any changes that have been made and come back to the form at a later time. Clicking Save does not submit the proposed changes to workflow and will allow you to save without filling out all the required fields. The status of the saved form will be "Added" and may be edited at a later time by searching for the course or doing a quick search for all added courses
Save & Submit (Start Workflow) to save and submit all changes for approval. All required fields must be filled out before the proposal can be submitted for approval. The new course proposal will go to the next person in the workflow. The next user in workflow will be sent an automated email to notify the user the new course proposal is ready to be reviewed, edited, approved, or rejected.

How to Propose to Inactivate a Course
Type the field of study abbreviation, course title, or course code that you want to inactivate into the search field.
- Select the course that you want to inactivate from the results window.
Click the Inactivate button.
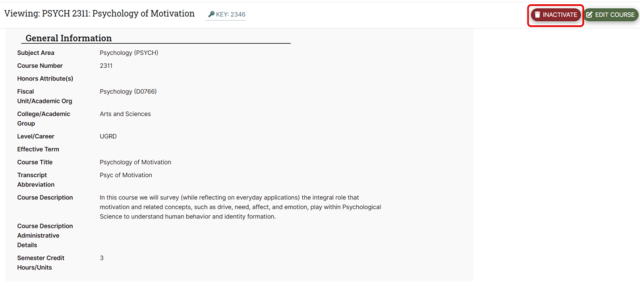
A new window will appear when the inactivate button is clicked.
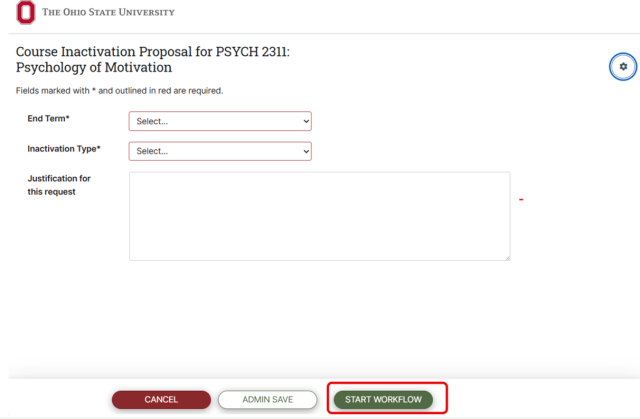
- Complete the form and click the “Start Workflow” button.