This section introduces the steps for printing the Schedule of Classes. The results are by Academic Organization, not be Subject.
At the completion of this section, you will be able to:
- Run and view the Schedule of Classes report for a term
- This can be an especially useful summary after term roll, before students begin enrollment, and immediately before classes begin.
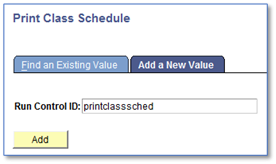
- Navigate to the Print Class Schedule component.
- Click the Add a New Value tab.
- Type in a Run Control ID.
- You only need to add a Run Control ID the first time you print the Class Schedule. After the Run Control ID is added, you can reuse it each time you need to print the Class Schedule.
Click Add.
- Complete the applicable fields on the Print Class Schedule page:
- Term
- Academic Organization Node
- Session-leave blank to get results for all sessions
- Schedule Print
- Print Instructor in Schedule
- Campus
Class Status

- Click the Report Options tab. Check any applicable boxes:
- Print Meeting Pattern/Instr
- Print Meeting Pattern Topic
- Print Class Attributes
- Print Class Notes
- Print Global Notes
- Print Sections Combined
- Print Class Characteristics
- Print Class Enrollment Limits
- Print Class Nbr for Non-Enroll
- Print Requirement Designation
- Print Reserve Capacities
Report Only (always check)
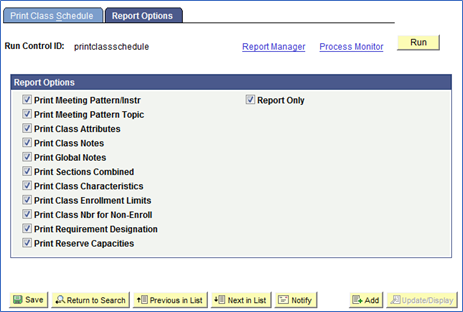
- Click Save and then click Run.
- Confirm the Server Name field is blank.
- It will default to the correct server.
- Select the Schedule of Classes checkbox. (Process Name SR201OS)
- The OS at the end of the process name indicates it is a custom OSU report.
- Click OK.
After you click OK, the Print Class Schedule page will be displayed.

Click the Process Monitor link.

- The Process Instance number (ex., 6029875) or the Process Type (ex., SR201OS) will help you identify the process you just ran.
The process is finished when the Run Status is "Success" and Distribution Status is "Posted". Click the Refresh button to update the Run Status immediately ("Queued" and "Processing" indicate the process is still running).
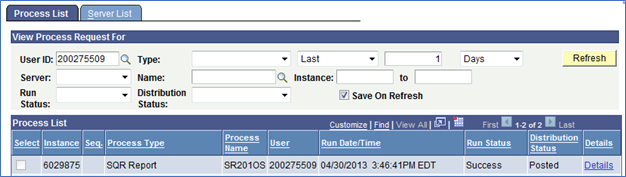
- Click the Details link to view the Schedule of Classes report.
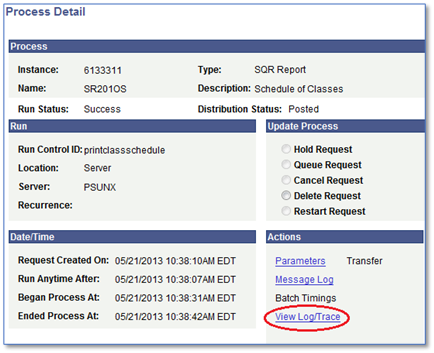
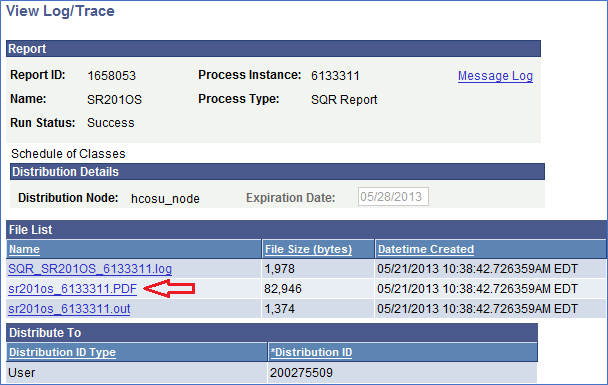
Click the View Log/Trace link.
Select the PDF report to be viewed.
View the report.
