This section introduces the steps for creating class associations for classes with multiple components (i.e. students needing to enroll into a Lecture, Lab, and Recitation for one class or any combination of two or more components that are not the same.)
At the completion of this section, you will be able to:
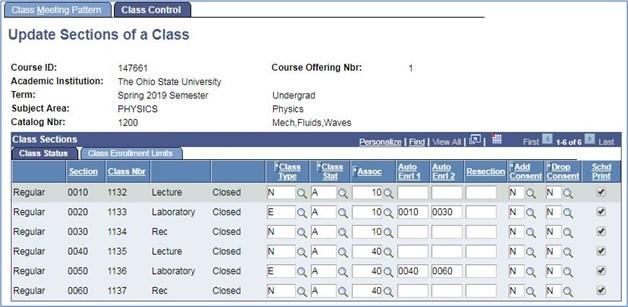
- View all courses from the course catalog that can be or have been scheduled for a term
- Set up a group of classes that are associated with each other
- Set up auto-enroll for associated classes
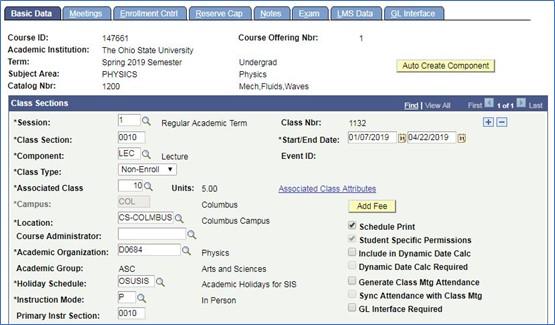
- Add a lecture to the schedule for multi-component class
- Enter a Class Section number.
- Use the magnifying glass next to the Component box to change the component type.
- Change the Class Type drop-down box to Non-Enroll component.
Enter an Associated Class number.
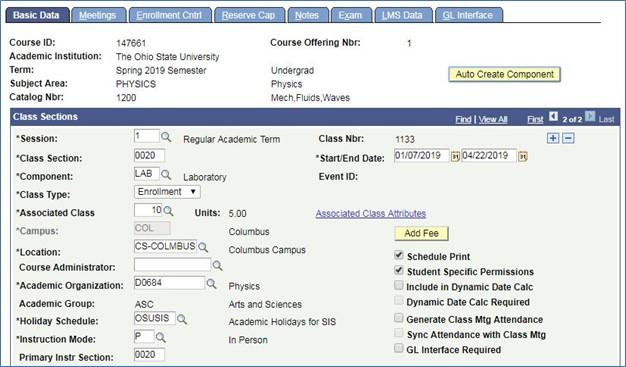
- Add a lab to the schedule for multi-component class.
- Enter a different Class Section number.
- Use the magnifying glass next to the Component box to change the component type if necessary.
- You may add multiple lab sections to correspond with the lecture.
- Change the Class Type drop-down box to Enrollment component.
Enter the SAME Associated Class number as the previously added lecture.
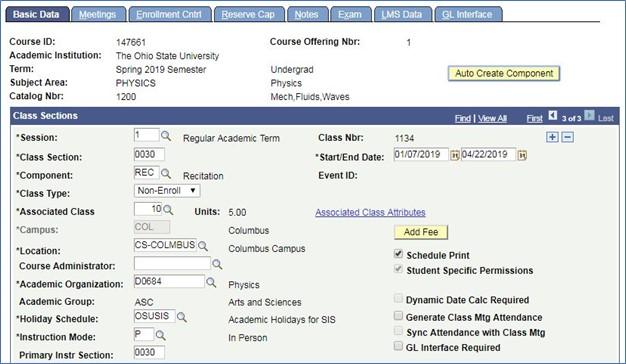
- Add a recitation to the schedule for multi-component class.
- Enter a different Class Section number.
- Use the magnifying glass next to the Component box to change the component type if necessary.
- You may add multiple recitation sections to correspond with the lecture.
- Change the Class Type drop-down box to Non-Enroll component.
Enter the SAME Associated Class number as the previously added lecture.
- On the Meetings tab, schedule sections so the three components do not conflict with each other.
- On the Enrollment Cntrl tab, enter the section numbers of the corresponding lecture and recitation (the Non-Enroll components) to the 1st Auto Enroll Section and 2nd Auto Enroll Section boxes on the lab (the Enrollment component).
- When auto-enroll is set up, students only have to enroll in the Enrollment component, and SIS will auto-enroll them into the other required components.
- You cannot auto-enroll components into the same component type (i.e. lecture cannot be auto-enrolled into another lecture.)
If auto--enroll is not set up, the system will prompt students to enroll into the additional required components.

- Once the multi-component class is built, use Update Sections of a Class as a reference to ensure proper setup.
A new association with a new lecture, labs and recitations can also be added by using a new Associated Class number in the next sequence.