The php.ini file in OTDI Web Hosting is not directly editable by our customers. However, that doesn’t mean you can’t modify the PHP Options in your hosted environment. This article explains alternate ways you can accomplish this.
PHP Options in The Web Hosting Dashboard
Many common PHP variables, along with some that simply won’t work in a user.ini file, can be toggled On/Off directly in the Web Hosting Dashboard. You’ll find them under the ‘Server Options’ Menu on the Left. Please note, these options directly affect the PHP configuration file (php.ini) and since this file is only read when the web server starts, you will need to save your changes & restart your container.
- PHP: Enable code profiling for debugging
- PHP: Enable error logging
- PHP: Enable session cookies
- PHP: Increase the maximum number of permitted opcached files (opcache.max_accelerated_files)
- PHP: opcache.validate_timestamps disabled to preserve cache. BOOST PERFORMANCE --but must purge cache after PHP code updates to get your changes quickly.
- PHP: XDebug: Enable 'coverage' mode.
- PHP: XDebug: Enable 'debug' mode.
- PHP: XDebug: Enable 'develop' mode.
- PHP: XDebug: Enable 'gcstats' mode.
- PHP: XDebug: Enable 'profile' mode.
- PHP: XDebug: Enable 'trace' mode.
- Extend response timeout from 60 to 300 seconds.
- PHP: Increase maximum upload size to 100Mb.
PHP Options In an .htaccess File
You can use directives in an .htaccess file to control many different aspects of your site; including your site’s PHP settings. You can also setup multiple .htaccess files to precisely control sub-sections your web site. For example, you might have one in /htdocs/ for your main pages, and another one in /htdocs/images/ to manage your site's image files.
For more information about using .htaccess in general, please visit:
To create an .htaccess file, just follow these steps:
- Log in to your OTDI Web Hosting account with Secure SHell (SSH) or sFTP.
- Use your favorite text editor to create an .htaccess file and save it your website's document root. (Don’t miss that leading dot!)
- If you want to set PHP settings for a specific subdirectory, save your file in that subdirectory.
- Exit the text editor and ensure the file’s permissions are set to 644. (rw- r-- r--)
Now that the file exists, you’re able to add your PHP Directives. For a complete list of those directives and what they’re capable of, please visit:
PHP Options in a .user.ini File
Almost everything that can be put into a php.ini file can also be put into a .user.ini file, and just like its .htaccess counterpart, it can go anywhere under your site’s Document Root. PHP actively scans for user.ini files in each directory, starting with the directory of the requested PHP file, and working its way up to the Document Root. (/htdocs/)
For additional help, please see these online support articles:
Troubleshooting
If you’re having problems getting your PHP modifications to work in your OTDI Web Hosted Environment, please follow these troubleshooting steps:
Perform a rolling restart of your Account’s Container:
In the OTDI Web Hosting Dashboard, under the General section click the Restart Website Button and give it 20± minutes before testing your modifications again: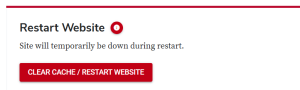
- Ensure the PHP version in the dashboard matches the version in your Terminal:
- This might help: Matching the PHP Version
- Check your site’s ‘php_error_log’ logfiles:
- Log in to your OTDI Web Hosting account with Secure SHell (SSH) or sFTP and navigate to /user/local/logs/[SiteID]/php_error_log*. (Your SiteID is your account’s unique identifier within the OTDI Web Hosting system)
- Contact us.