List management is done in the Mailman OSU web portal. Log in using the Microsoft log in button with your Ohio State Username and password.
Select the list you want to manage by selecting the name of the list.
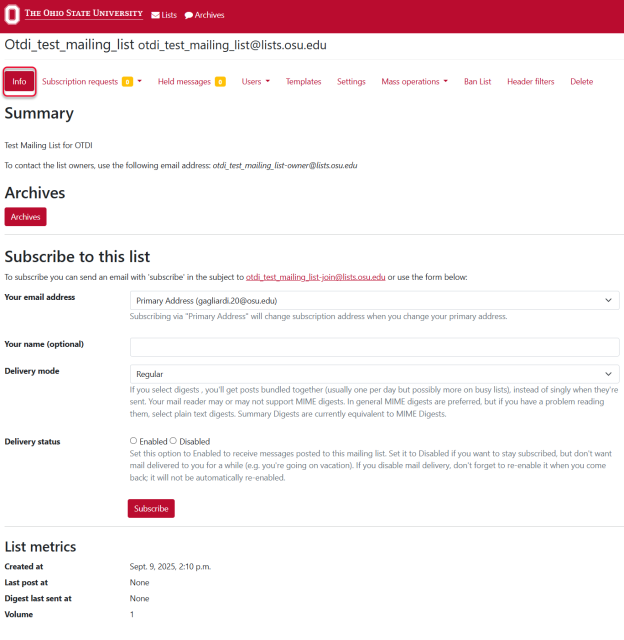
The first screen displays important information about the list, such as the full name, a summary about what the list is used for, how all the mailing list owners can be contacted at once and more, depending on the list and its needs. List management can be done using the navigation buttons across the top of the mailing list.
Settings
Selecting Settings at the top will display the settings for the mailing list. The first screen displayed allows the descriptions of the Mailing List to be changed. The different settings can be accessed by using the navigation menu on the left-hand side of the window. The settings that can be changed are:
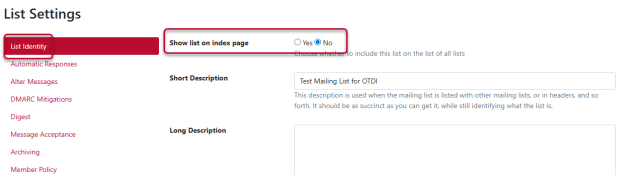
- List Identity (default first screen)
- This is information about the list itself, and information others can use to find and subscribe to the list.
- Automatic Responses
- Alter Messages
- DMARC Mitigations
- Digest
- This controls summary emails for subscribers to a list.
- Message Acceptance
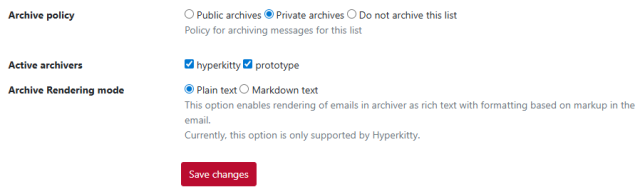
- Archiving
- Archiving policy can be set here for the entire list. The options are:
Public archives
- Private archives
- Do not archive (remember to keep any record retentions in mind when setting archiving policies)
- Archiving policy can be set here for the entire list. The options are:
- Member Policy
- This allows the owner to control how members can subscribe and unsubscribe from the mailing list.
- Bounce Processing
- Newsgroup Gateway
List Settings
- Adjust Member Moderation for your Mailing List
List Management Common Tasks
Add an Owners, Non-members or Moderators
When in the settings of the individual mailing list, the Users menu is used to manage mailing list members and the roles. The Users menu contains:
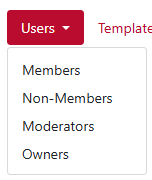
- Members shows the current membership of the list.
- Non-members shows the current members of the list that are not part of the organization. This also allows a list owner to add non-members.
- Moderators allows the owner to add and remove a moderator(s) to the list.
- Owners display the current owners of the list and allows other owners to be added to the list.
Delete a Mailing List
Owners can delete a mailing list without having to contact the IT Service Desk. Select the list you want to manage by selecting the name of the list. In the navigation bar at the top select the Delete button to delete the selected list.

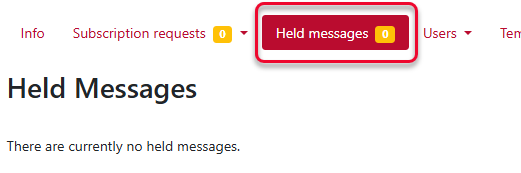
Approve Held Messages for Moderated Mailing Lists
When moderation is turned on messages may be held until they can be reviewed by an owner or moderator of the list. Select Held Messages at the top of the screen to access any held messages so they can be approved or denied.
Approve Subscription/Un-subscription Requests
Subscription requests to a mailing list or un-subscription requests may need to be approved. Select Subscription requests to open the menu.
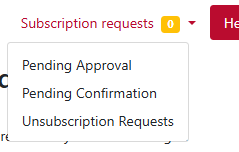
- Pending Approval are subscription requests from a user that need to be approved.
- Pending confirmation are subscription requests waiting for a user to confirm their subscription.
- Un-subscription Requests are requests to unsubscribe that need to be approved.
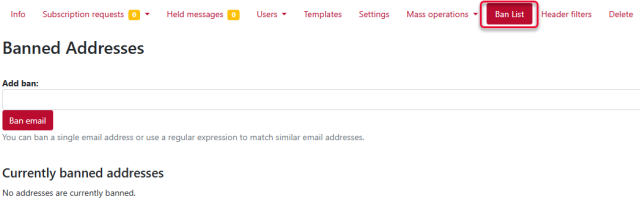
Restrict a Sender
To restrict a sender in Mailman, you can use the "Banned Addresses" feature. This allows you to prevent specific email addresses from sending messages to the mailing list. Select Ban List at the top of the window to access the list of banned email addressed. An email address can be added here by adding a single email address or use regular expression matching to match similar email addresses.
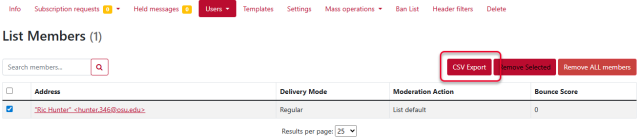
Download the Member List
To download a copy of the Member list, select the Users menu and select Members. The list of members will display.
Select the members to be included in the list by placing a checkmark in the box at the beginning of the row for each member. Select CVS Export at the top. A .cvs file with the name Subscribers will be downloaded to the device.
Archiving Policy
Archiving a mailing list involves storing and organizing the messages sent to the list so that they can be accessed and referenced later. This is particularly useful for maintaining a record of discussions, decisions, and information shared among the members of the mailing list.
In Mailman3, there are two types of archives: public and private.
Public Archive: This type of archive is accessible to anyone, even those who are not members of the mailing list. It allows for greater transparency and can be useful for open communities or projects where sharing information widely is beneficial. Public archives can be indexed by search engines, making the content discoverable by a broader audience.
- Private Archive: This type of archive is restricted to members of the mailing list. It ensures that the content remains confidential and is only accessible to those who are part of the group. Private archives are ideal for discussions that involve sensitive information or are intended to be kept within a specific community.
With Do not archive this list, the messages will not be archived. Please remember to keep retention policies in mind when setting archiving.
Create Announcements Only List
To create an Announcements Only list there are a couple of settings that need to be changed. Start by navigating to the List Settings of the list to be modified.
Select Message Acceptance on the right side of the screen. Scrolling down through the settings, look for Default action to take when a member posts to the list and Default action to take when a non-member posts to the list. Both will need to be set to Reject (with notification) or Discard (no notification). This will keep people other than owners from posting to the list.